One of the most exciting and beautiful natural events is the brilliant display of the Northern Lights, or Aurora Borealis. You might have the notion that this spectacular event only occurs in places like Alaska, Canada, or Iceland, but under the right conditions it’s possible to observe the phenomenon even in the lower 48 states, though northern regions certainly experience more frequent (and more vivid) Northern Light shows.
Sometimes the Lights can be impressive, but other times they appear wispy, grey, and vague. No problem. You have a tool on hand that will allow you to observe the Northern Lights in their full glory—and preserve a record of them in the process. Your camera—with its excellent light-gathering abilities—is able to truly capture the complete shape, color, and brilliance of the auroras.
Night photography can be a tricky challenge, but if you follow these steps to get you started, you should be able to learn how to photograph the Northern Lights, and obtain satisfactory results even on your first try. Plus you’ll get an idea of what to expect if you hope to photograph the auroras but have never seen them in person.
Use a short focal length
The auroras are big—as in, they’ll take up a third or more of the sky. Zooming in on specific features might be helpful in some instances (we’ll look at that in a minute), but for the most part you’ll probably want to start off with a wide-angle lens. For full-frame DSLRs, I would recommend using at least a 28mm; that field of view translates to about 18mm on a crop sensor. If you have something even wider, give it a try. A strong Northern Light show can feel grand and epic, and a wide lens helps convey that feeling.
Shoot in manual
I rarely advise shooting in manual mode, but shooting the Lights is an exception. Aperture Priority (“Av” on some cameras) is the mode I typically recommend for outdoor photography, because it allows you to stay in control of the camera while still benefiting from its assistance. But for dim subjects like the Northern Lights, Aperture Priority may get confused, so manual mode is the way to go.
Gather light
The main problem with photographing the Northern Lights (and other nighttime subjects) is the lack of natural light. One key to making them appear brilliant and vivid on camera is to open up your shutter and leave it open—for a long time.
Photographers are used to discussing daytime shutter speeds like 1/500th or 1/1000th of a second, but those short durations are not at all helpful for photographing the auroras. For this, you’re going to need to think more in terms of ten, twenty, or thirty seconds. That gives the faint light of the aurora time to really soak into the camera’s sensor and build up a strong image. Don’t worry if the aurora is shimmering and appears to be in motion—the moving light will still record just fine on a still image.
Note: if you go much longer than 30 seconds, the stars in the scene will begin to streak and smear due to the rotation of the Earth.
Then gather more light
You can increase the light reaching your sensor even more by opening up your lens to its maximum aperture. Then, experiment with different high ISO settings. While super-high ISOs are generally avoided because of the excess noise (grain) they produce, this is usually an acceptable compromise for aurora work because of the diffuse nature of the subject. Modern DSLRs can produce workable results even at ISO 6400, so start there and take multiple shots above and below 6400 (a technique known as bracketing). Keep in mind that if your ISO is too high and your shutter speed too long, it’s possible to accidentally overexpose the auroras (I’ve done this!).
Use a tripod
With shutter speeds ranging into many seconds, a tripod (or other fixed support) is absolutely required for successful aurora photography. Complaints like “tripods are a nuisance!” have no place here—you must have a way to keep the camera rock solid for the duration of the shot.
Focus on infinity
When learning how to photograph the Northern Lights, nighttime focusing can be your biggest challenge. First, turn off your autofocus—it will just search back and forth and won’t be able to lock onto the correct distance. Instead, try manually focusing on something distant, like a faraway light on a building, or even the Moon if it’s visible. You can also try pre-focusing on infinity during the daytime while it’s easier to see.
Get creative
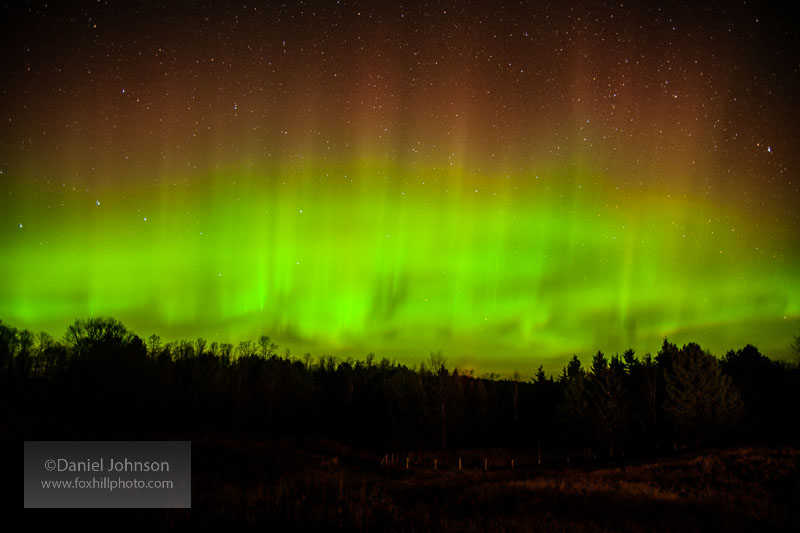
Now you’re ready to have some fun! While you can always just shoot the sky, your photos will likely be more interesting if you include something else in the frame, even if it’s just trees or buildings on the horizon. Or, try placing the camera down low and shoot silhouettes of friends—or even yourself—with the Northern Lights as a background. This can work well if you have a hill to use.
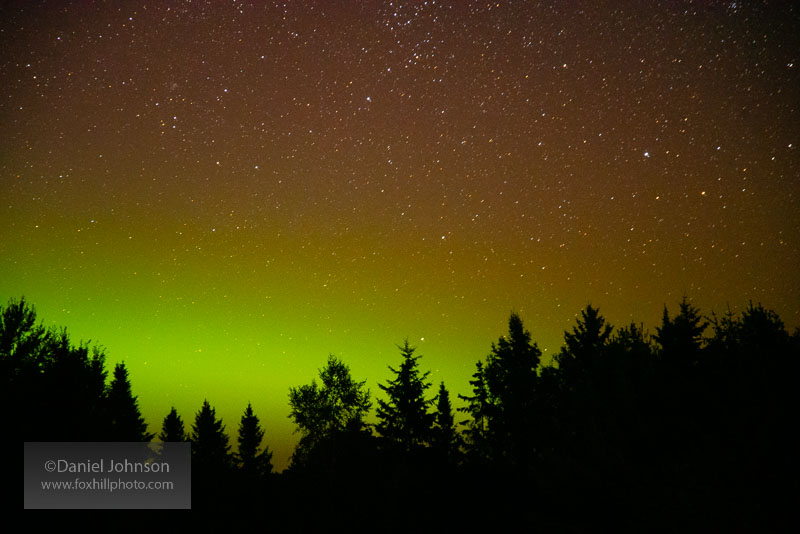
You might also try including certain constellations in the composition, like the Big and Little Dippers, which are in the northern regions of the sky and will be near the auroras. You can also attempt to increase your focal length somewhat (say 50mm to 100mm) and fill the frame with a particular area of the aurora. I’ve done this and used the silhouettes of spruce trees to help give the image more interest and some extra “north woods” feel. Use some imagination, and enjoy the spectacle!
Now that you know how to photograph the Northern Lights, learn how to shoot better wildlife pictures.
**All images by author, depicting Aurora Borealis, Northern Lights over forest in Northern Wisconsin.
Daniel Johnson is a professional pet photographer and the author of several animal and photography books. His dog, horse, and rural life images appear regularly in books, magazines, and calendars. Dan offers workshops for those ready to take the next step in their photography. To learn more or to view Dan’s photography, visit www.foxhillphoto.com.